Overview
This private Minecraft server setup guide documents a practical workflow for deploying a Minecraft Java Edition server on an Ubuntu cloud server with Docker and connecting to it from a PC Minecraft client.
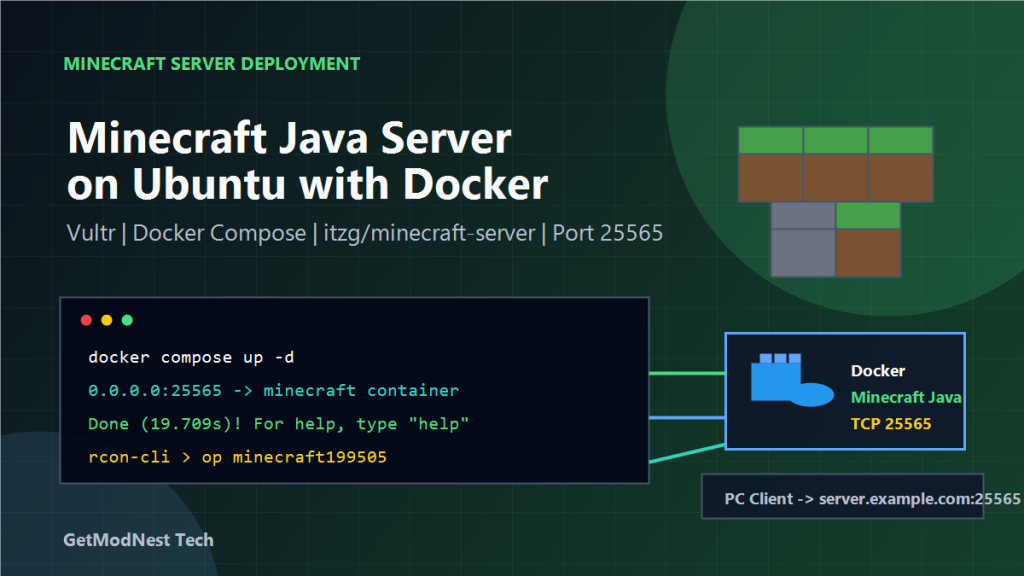
The recorded environment uses a Vultr Ubuntu Linux server, the itzg/minecraft-server Docker image, Docker Compose, and the default Minecraft Java server port 25565.
prepare cloud server -> install Docker -> create docker-compose.yml -> start Minecraft server -> open firewall port -> connect from PC client -> assign operator permission -> manage server filesThis setup is useful for small private servers, testing plugin development, running a lightweight community server, or building a repeatable Minecraft server deployment workflow.
Server Environment
Cloud provider: Vultr
Operating system: Ubuntu Linux
Public IP: xxx.xxx.xx.xxx
CPU: 2 cores
Memory: 4 GB
Disk: 80 GB
Minecraft edition: Java Edition
Server port: 25565/TCP
A 2-core, 4 GB server is enough for a small vanilla Minecraft Java server. For a larger server, plugin server, or modded server, more memory and CPU resources may be required.
Install Docker and Docker Compose
First update the Ubuntu system packages.
apt update && apt upgrade -yInstall Docker with the official convenience script.
curl -fsSL https://get.docker.com | bashInstall the Docker Compose plugin.
apt install -y docker-compose-pluginVerify the installed versions.
docker -v
docker compose version
The recorded output was:
Docker version 29.5.0, build 98f1464
Docker Compose version v5.1.3
Create the Minecraft Server Directory
Create a dedicated directory for the Minecraft server deployment.
mkdir -p /opt/minecraft
cd /opt/minecraft
Keeping the Compose file and server data under a predictable directory makes future maintenance, backup, and migration easier.
Create docker-compose.yml
Create a docker-compose.yml file under /opt/minecraft.
services:
  mc:
    image: itzg/minecraft-server
    environment:
      EULA: "true"
    ports:
      - "25565:25565"
    volumes:
      - data:/data
    stdin_open: true
    tty: true
    restart: unless-stopped

volumes:
  data: {}
Key settings:
itzg/minecraft-server: a widely used Docker image for Minecraft Java serversEULA: "true": accepts the Minecraft server EULA25565:25565: exposes the default Minecraft server portdata:/data: stores world data and server configuration in a Docker volumerestart: unless-stopped: restarts the container automatically unless it is manually stopped
Start the Minecraft Server
Start the server in detached mode.
docker compose up -dA successful first start should pull the image, create the volume, and start the container.
Image pulled
Container started
Check the running container.
docker psExample output:
CONTAINER ID   IMAGE                   COMMAND                  STATUS        PORTS                                             NAMES
13f7458d629f   itzg/minecraft-server   "/image/scripts/start"   Up (healthy)  0.0.0.0:25565->25565/tcp, [::]:25565->25565/tcp   minecraft-mc-1
The healthy status indicates that the Minecraft server process has started correctly inside the container.
Watch the Server Logs
The server logs are very important during the first startup.
docker logs -f minecraft-mc-1During startup, the image will automatically download the Minecraft server, create the world, generate configuration files, and start the server process.
Important signs in the log:
server files downloaded
world generated
RCON enabled
Done (19.709s)! For help, type "help"
The Done line means the Minecraft server is ready to accept client connections.
Open the Firewall Port
The Minecraft Java server uses TCP port 25565 by default.
Allow this port in Ubuntu UFW.
ufw allow 25565/tcp
ufw enable
ufw status
If the cloud provider has an external firewall, the same port must also be opened there.
For Vultr, confirm that the firewall allows:
Protocol: TCP
Port: 25565
Source: 0.0.0.0/0
Both the server firewall and the cloud firewall must allow the connection. If either side blocks the port, the PC client will not be able to connect.
Confirm the Server Is Listening
Use ss to confirm that the Minecraft port is listening on the server.
ss -tlnp | grep 25565Example output:
LISTEN 0 4096 0.0.0.0:25565 0.0.0.0:* users:(("docker-proxy",pid=949140,fd=8))
LISTEN 0 4096 [::]:25565    [::]:*      users:(("docker-proxy",pid=949146,fd=8))
This means Docker is forwarding traffic from the host port 25565 to the Minecraft container.
Connect from the PC Minecraft Client
On the PC, install or open Minecraft Launcher and start Minecraft Java Edition.
The recorded client version was:
Minecraft Java Edition 26.1.2In the Minecraft client:
Multiplayer -> Add ServerEnter the server address:
xxx.xxx.xx.xxx:25565If the server is reachable and the versions are compatible, the server should appear in the multiplayer server list.
Verify Player Login from Server Logs
After joining the server from the PC client, check the latest server log inside the container.
docker exec minecraft-mc-1 cat /data/logs/latest.log | grep "joined the game"Example output:
minecraft199505 joined the gameThis confirms that the client successfully connected to the Minecraft server.
Grant Operator Permission
To manage the server from inside the game, grant operator permission to the player account.
Enter the container RCON console.
docker exec -it minecraft-mc-1 rcon-cliRun the op command.
op minecraft199505Expected output:
Made minecraft199505 a server operatorAfter this, the player can run administrator commands from the game chat or console.
Common In-Game Admin Commands
Set the world time to day.
time set daySet the world time to night.
time set nightOther useful commands can be executed through RCON or by an operator in the game.
Minecraft Server Data Directory
The container stores important server files under /data.
List the directory:
docker exec minecraft-mc-1 ls /dataTypical structure:
/data
├── .cache/                         runtime cache
├── .rcon-cli.env                   RCON CLI environment file
├── .rcon-cli.yaml                  RCON CLI configuration file
├── eula.txt                        Minecraft EULA acceptance file
├── server.properties               core server configuration
├── ops.json                        operator list
├── whitelist.json                  whitelist list
├── banned-players.json             banned players
├── banned-ips.json                 banned IP addresses
├── usercache.json                  player cache
├── minecraft_server.26.1.2.jar      Minecraft server program
├── libraries/                      Java runtime libraries
├── versions/                       version management directory
├── logs/                           server logs
├── world/                          world save data
└── user_jvm_args.txt               JVM options
The most important directory is world/.
world/
├── level.dat                       core world metadata
├── level.dat_old                   previous world metadata backup
├── data/                           global world data
├── datapacks/                      datapacks for gameplay extension
├── dimensions/                     dimension data such as overworld, nether, and end
├── players/                        player data such as inventory, location, and state
└── session.lock                    world lock file
For backup and migration, the world/ directory and configuration files such as server.properties, ops.json, and whitelist.json are especially important.
Practical Troubleshooting Checklist
If the PC client cannot connect, check the following items in order.
1. Is the Docker container running?
2. Does docker ps show port 25565 mapped to the host?
3. Does docker logs show the Done message?
4. Is Ubuntu UFW allowing 25565/tcp?
5. Is the cloud provider firewall allowing TCP 25565?
6. Does ss -tlnp show 0.0.0.0:25565 listening?
7. Is the PC client using Minecraft Java Edition?
8. Is the client version compatible with the server version?
9. Is the server address entered as public-ip:25565?
10. Is the player blocked by whitelist or ban configuration?
Most connection problems are caused by firewall rules, wrong edition, wrong version, or missing port mapping.
Full Private Minecraft Server Setup Flow
The final workflow is:
cloud server
  -> install Docker
  -> create docker-compose.yml
  -> start Minecraft container
  -> open TCP 25565 in Ubuntu and cloud firewall
  -> confirm port listening
  -> connect from Minecraft Java client
  -> verify login in logs
  -> grant OP permission
  -> manage server through RCON and /data files
FAQ
Can I set up a private Minecraft server with Docker?
Yes. Docker Compose and the itzg/minecraft-server image can be used to run a private Minecraft Java Edition server on Ubuntu with a repeatable deployment workflow.
Which port does a Minecraft Java server use?
Minecraft Java Edition uses TCP port 25565 by default. This port must be open in both the Ubuntu firewall and the cloud provider firewall.
Can friends connect to this private Minecraft server?
Yes. After the server is running and port 25565 is open, friends can connect from Minecraft Java Edition by using the public server IP address and port.
Where is Minecraft server data stored in Docker?
With the itzg/minecraft-server image, server data is stored under the /data directory inside the container or Docker volume.
Final Conclusion
This setup uses the itzg/minecraft-server Docker image, a widely used Docker image for Minecraft Java Edition server deployment.
This deployment used Docker Compose and the itzg/minecraft-server image to run a Minecraft Java Edition server on an Ubuntu cloud server.
The most important points were accepting the EULA, mapping TCP port 25565, opening both the operating system firewall and the cloud firewall, checking server logs until the Done message appeared, and verifying the player login from /data/logs/latest.log.
For small Minecraft servers, Docker provides a clean and repeatable deployment method. The same structure can later be extended with server properties, whitelist management, backups, plugins, Paper or Spigot server types, and automated server maintenance.
Need Help with a Similar Problem or Project?
This note is based on a real troubleshooting, configuration, or development workflow. If you need help with Minecraft server deployment and scripts, Linux servers, database systems, or AI development environments, GetModNest can provide practical technical support, troubleshooting, and development assistance.
Email: info@getmodnest.com