Overview
This article documents a practical setup process for installing OpenClaw on Windows and integrating it with Kimi / Moonshot AI and a Feishu bot.
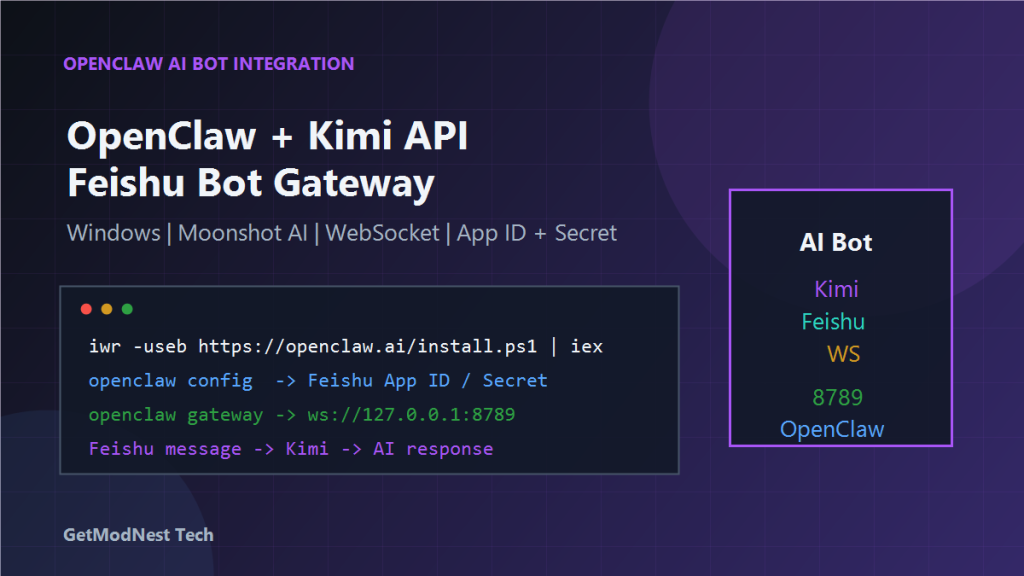
The setup involved installing Node.js and Git, adjusting PowerShell execution policy, installing OpenClaw CLI, configuring Moonshot AI / Kimi, opening the OpenClaw web UI, creating a Feishu bot application, configuring permissions and event subscriptions, connecting through WebSocket Gateway, and handling API rate limit issues.
The final goal was to create a Feishu bot that receives user messages, forwards them through OpenClaw Gateway to a Kimi model, and returns AI responses.
Environment
- OS: Windows
- AI provider: Moonshot AI / Kimi
- Model example:
Kimi K2.5 - OpenClaw web UI:
http://127.0.0.1:18789 - Required tools:
Node.js,Git,PowerShell,OpenClaw CLI
Architecture Overview
Feishu user
  -> Feishu bot
  -> WebSocket event channel
  -> OpenClaw Gateway
  -> Kimi model
  -> AI response
  -> Feishu bot reply
OpenClaw acts as the gateway and orchestration layer between the chat platform and the AI provider.
Step 1: Install Node.js
OpenClaw CLI depends on Node.js. After installing Node.js, verify it from PowerShell or Command Prompt:
node -v
npm -v
If both commands return versions, Node.js and npm are available.
Step 2: Install Git
Git is also required because some OpenClaw components or updates depend on Git.
git --versionIf the version is returned, Git is installed correctly.
Step 3: Adjust PowerShell Execution Policy
On Windows, PowerShell may block script execution by default.
Set-ExecutionPolicy -ExecutionPolicy RemoteSigned -Scope CurrentUserThis allows locally created scripts and trusted remote scripts to run under the current user.
Step 4: Install OpenClaw CLI
Install OpenClaw using the official installation command:
iwr -useb https://openclaw.ai/install.ps1 | iexAfter installation, OpenClaw CLI is installed under a user directory similar to:
C:\Users\<username>\.openclawIf the command is not recognized after installation, reopen PowerShell or check whether the OpenClaw path was added to environment variables.
Step 5: Open the OpenClaw Web UI
The local web UI address is:
http://127.0.0.1:18789Open this address in a browser. If the page cannot be opened, check whether the OpenClaw service or gateway process is running.
Step 6: Configure the AI Model Provider
In OpenClaw, configure the AI provider.
The notes used:
Moonshot AI / Kimi K2.5You need a Moonshot API key. Configuration usually includes provider name, base URL if required, API key, and model name.
The API key should be stored securely and should not be published in code or screenshots.
Step 7: Create a Feishu Bot Application
In the Feishu developer platform, create a bot application.
During bot creation, obtain:
App ID
App Secret
These credentials are required by OpenClaw to connect to the Feishu bot.
Step 8: Configure Bot Permissions
In the Feishu developer console, configure bot permissions.
The notes mentioned permission items such as:
im
message related permissions
Common permission categories include receiving messages, sending messages, reading group or chat information, and accessing event subscriptions.
After changing permissions, publish or save the application configuration so the changes take effect.
Step 9: Configure Feishu Event Subscription
In the Feishu developer console, configure event subscription.
The notes mentioned setting subscription type to long connection:
Event subscription -> subscription mode: long connectionThis allows OpenClaw or its gateway to receive events from Feishu through a persistent channel.
Step 10: Configure OpenClaw Channels
In PowerShell, run OpenClaw configuration:
openclaw configEnter the channel configuration and fill in the Feishu application information:
App ID
App Secret
If using WebSocket-based Feishu event delivery, configure the WebSocket channel as required.
Step 11: Start OpenClaw Gateway
Start the OpenClaw gateway:
openclaw gatewayAfter startup, the service should listen locally. The notes recorded a local URL similar to:
ws://127.0.0.1:18789This indicates that the gateway is running and ready to handle real-time events.
Step 12: Publish the Feishu Bot Version
After configuring permissions and event subscriptions, publish a new Feishu bot version.
- edit bot permissions
- save configuration
- submit for version update or release
- confirm release
After version management and permission changes, the application needs to be published for changes to become effective.
Step 13: Test the Feishu Bot
Testing flow:
- open the Feishu client
- find the bot
- send a test message
- check whether OpenClaw receives the event
- check whether the gateway calls the Kimi model
- confirm that the bot replies in Feishu
message -> Feishu bot -> WebSocket -> OpenClaw Gateway -> Kimi model -> AI responseHandling Kimi API Rate Limit Issues
One issue recorded during testing was:
API rate limit reachedPossible causes include Moonshot API request frequency exceeding the quota, too many test messages in a short time, or stricter rate limits on the selected model.
Possible solutions:
- wait and retry later
- reduce test request frequency
- check Moonshot API quota and billing settings
- change to another available model if appropriate
- add retry and backoff logic in the integration layer
Common Issues and Fixes
1. node or npm Is Not Recognized
node -v
npm -v
Reinstall Node.js or reopen PowerShell after installation.
2. Git Is Not Recognized
git --versionInstall Git and ensure it is added to PATH.
3. PowerShell Blocks the Install Script
Set-ExecutionPolicy -ExecutionPolicy RemoteSigned -Scope CurrentUser4. OpenClaw Web UI Cannot Be Opened
Check whether OpenClaw is running and whether port 18789 is occupied.
http://127.0.0.1:187895. Feishu Bot Does Not Receive Messages
Check bot permissions, event subscription, version publishing, gateway status, and App ID / App Secret.
6. AI Response Fails
Check Moonshot API key, selected model name, rate limit status, network connectivity, and OpenClaw logs.
Security Notes
Do not expose API keys in public repositories or screenshots.
Sensitive values include:
Moonshot API Key
Feishu App ID
Feishu App Secret
Use environment variables or local configuration files with restricted permissions whenever possible.
Final Conclusion
This setup connected OpenClaw on Windows with Moonshot AI / Kimi and a Feishu bot.
The main steps were to install Node.js and Git, adjust PowerShell execution policy, install OpenClaw CLI, open the local web UI, configure Moonshot AI / Kimi API key, create a Feishu bot application, configure permissions and event subscriptions, run OpenClaw Gateway, and test message flow from Feishu to Kimi and back.
The most important lesson is that this kind of chatbot integration has multiple layers: local runtime environment, OpenClaw CLI and gateway, AI provider configuration, Feishu bot permissions, event subscription and WebSocket delivery, and API quota limits.
Checking each layer separately makes troubleshooting much easier.
Need Help with a Similar Problem or Project?
This note is based on a real troubleshooting, configuration, or development workflow. If you need help with databases, Linux servers, web applications, desktop software, iOS and Android apps, automation scripts, deployment, or AI development environments, GetModNest can provide practical technical support, troubleshooting, and development assistance.
Email: info@getmodnest.com